Friday, October 11, 2013

Punch Happy September Stamp Camp

Who doesn't love owls?  Stampin' Up! sells a really great owl punch set, but I love this alternative design made from the punches that I already had.  I'm a "use what you have" kind of person. (This is why a few of the supplies that I used might be retired from the catalog already--but hey--I'm sure there are other supplies still available that could be substituted and look just as great!).

The inside says "Thanks for [owl] you do."

These teacher designs made from punches amazed me, so I just had to make my own versions!  On this one, we used the old butterfly punch to make her dress.  (One full butterfly for the "back" of her dress, plus two half butterflies overlapped side by side fort he bottom part of her skirt.)  I wrote on her chalkboard with the white gel pen (see the other teacher card for another chalkboard option).
This teacher's dress was made with our current heart punch (three hearts here).  The chalkboard writing here was done by writing on the board with a regular ballpoint pen--the pen ink is then embossed with white embossing powder (ballpoint pen ink is sticky enough for the e.powder to stick).  I also really liked the blingy touch of using a thin strip of Brushed Silver card stock for the chalk tray :).


I took this design out of my vault.  That frog is almost kissable, eh?
These last four cards were not made during my camp (my camps usually feature just three designs, and people fill up three hours making up to three of each design), but I made them to show off at the punch camp anyway.  I love this Mario card!  My campers didn't select this design for the camp because they liked the first three better...but I'm also guessing they must not know as many Mario lovers as I do.  Isn't he cute?

All of the dog puns we could put on the inside of this cute puppy card just give me warm fuzzies.  And I'm not even a dog person. 

Didi pointed out to me that this bird's belly should be white if it were just like the Angry Birds game, oh well...I love it just the same.  What a fun idea for a card!  (Not my original design.)  I cut one piece of card stock in the shape of a cloud and sponged around it to make that cool cloudy sky. 

Simple and perfect for the season.  I hope I can find someone who needs to receive this card, because it deserves to be sent.  This copy though will remain in my collection.  Good thing I like to make multiples!!


Which designs do you like the best?  Have you had any great card-making moments recently you could share with us? 

Happy stamping! 
-Jenna


Monday, June 10, 2013

Cards for Men and Boys 2013

I did this one at a camp in Oregon.  I loved it so much I had to revive it and do it again.  Simple sponging and masking for the green panel, plus markers and "thumping" on the trees make the images stand out.  But one of the most fun parts of this card is the faux button--we actually made it out of paper!

"Faux suede" wallet for Dad.  We brushed the ink pad all over the paper to give it a leatherish look.  Inside, we made pockets for extra love. 


I can't believe my favorite little dinosaur set also got retired.  Waaah.  I won't get to feature him in camps anymore, but I will forever use it to make cute cards for kids and my family's own old dinosaurs :).


Spring Stamp Camps 2013

This card was much easier to make than it looks.  The paper trimmer and my SNAIL adhesive helped me make this card in just about 15-20 minutes once I had the design figured out in my head :).

It was fun to use my regular old pinking sheers again!  Silver embossing and embossed polka dots made with the Big Shot add the pizzazz this card needed.

I really found this set to be a lot of fun.  Maybe someday I'll even put people in my car, but for now, flowers were just what I wanted :).

Wouldn't this be a great solution to the world's smog problem?  Ha ha :).  I love the bright red on this card, which stands out with the help of black and Marina Mist.

Who wouldn't want to open this jar of love?  The Sizzlets that match our jar set (sorry, I don't remember the name at the moment) make the cutting out of the jar parts so super simple!

Flowers coming out of a car, and hearts coming out of an elephant's trunk...I love it!  I also love this technique of stamping line-art images on designer paper and cutting (or punching) them out.  So pretty!
What I loved best about making this card was using the new photopolymer stamp set.  If you haven't heard about that kind of stamps yet, it's brand new from Stampin' Up!--although not exactly new in the craft stores.  Stampin' Up! has been working for years though to develop this type of acrylic-mount stamp image that WON'T yellow or crack in time, and they've finally done it.  Now we have CLEAR images that we can mount on our CLEAR blocks, and that makes the placement of word stamps and any other kind of images easier than ever.  I didn't use anything but my eyeballs to line up the speech bubble and the words inside it.  So easy and fun! 

I'm going to miss this pretty butterfly set, "Kindness Matters."  It just retired.  I used to not like butterfly things, but now I can't get enough of them.  Okay, except for those silly giant ones that people stick on the outside of their houses.  You'll never catch me doing that.
Of all of the colors I tried this card with, orange (Pumpkin Pie) ended up being my favorite for this design.  A little Dazzling Details on the flowers was the finishing touch. 

I hope you enjoyed my Spring designs!  The first two were actually designs that I considered for my "Cards with Men and Boys" stamp camp, but three other designs won the honors of being made at that camp.  I'll showcase those three winning designs in my next post :). 


Friday, February 8, 2013

Oldies but Goodies

My good friend Deb and I decided it would be fun to resurrect some of my old designs one day, so we went through my card samples boxes and chose these five cards to recreate.  They were all made with stamps that are retired, but fortunately for us I still had all of the supplies needed.  I just wanted to share with you some "oldies but goodies".  : )

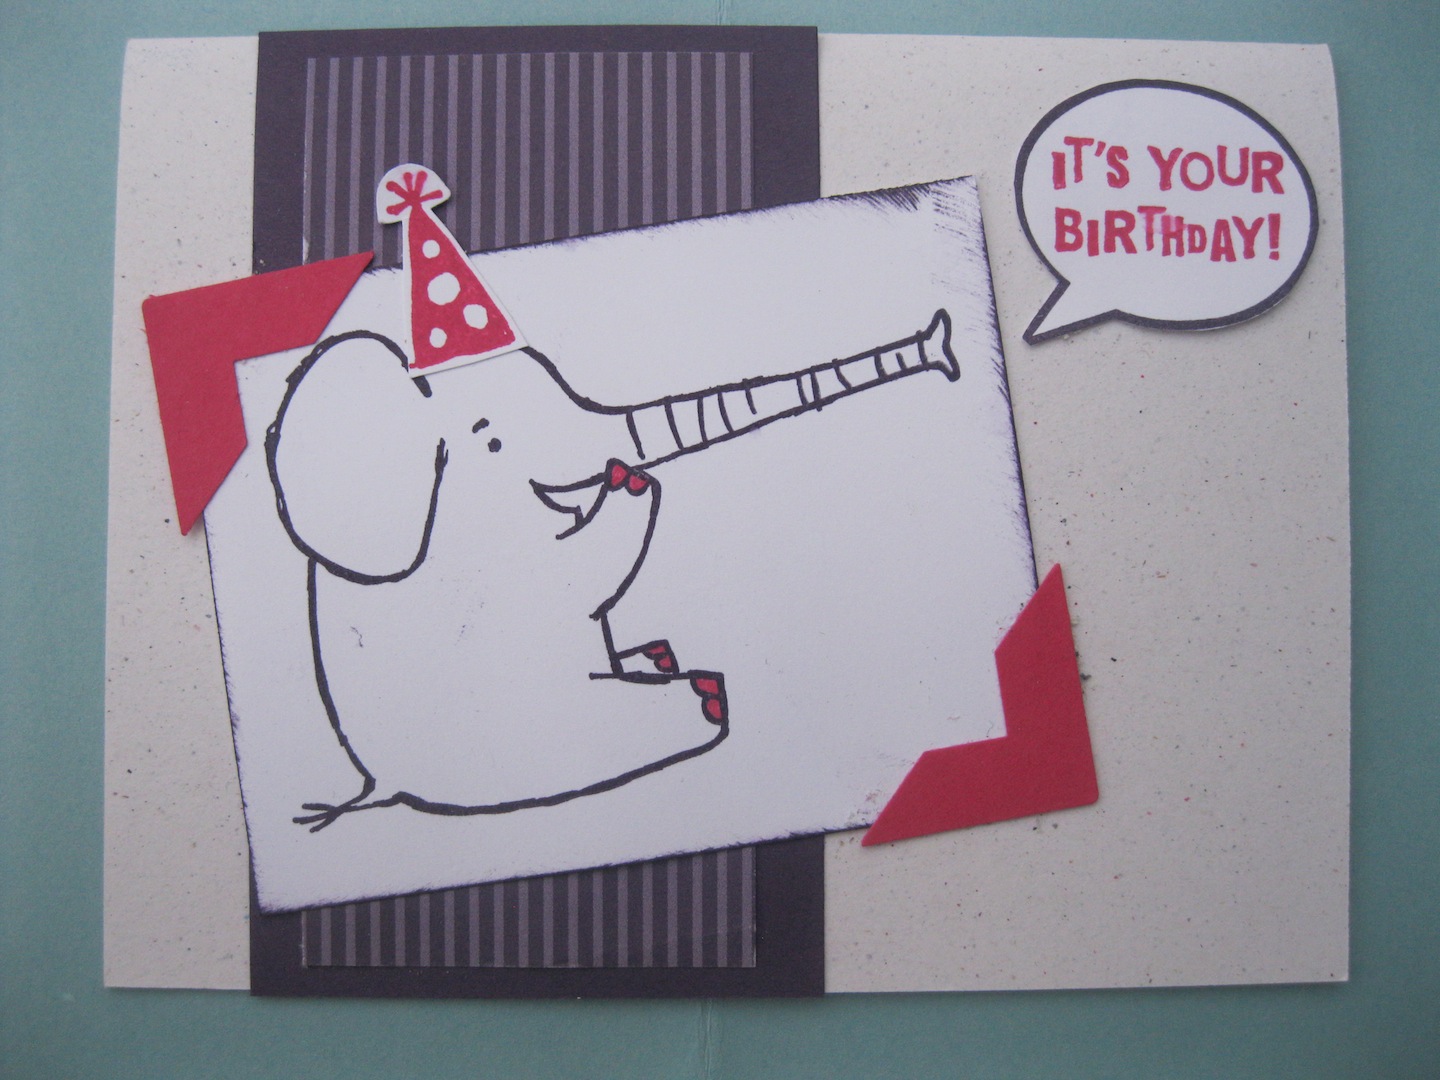
The fun with this card is how it looks when opened--the focal piece from the front is really on the inside of the card.


This set with the chicken and eggs humor was one of my favorites.  I was sorry it didn't stay "current" in the catalog for a longer period of time.  But at least I can still use it whenever I want :).
This design always makes me a little sad, because of a memory I have attached to it.  I gave this card to the family of a little boy, a friend of my son's, who passed away.  They were very grateful for the sentiment, and I loved the beauty of this saying because of them. 

Lots of little details on this cards make it pleasant for the eyes.  I love these colors together, and the very fine background prints add the perfect amount of texture and finesse.

Earthy, and bright at the same time.  I love this card as a manly greeting, or a simple "down to earth" thank you card. 
I hope you enjoyed my little blast from the past :)!

Wednesday, November 7, 2012

Christmas Cards Stamp Camp 2012

I love snowmen.  They are my favorite Christmas decoration theme.  This stamp set "Snow Much Fun" is just way too cute and had my name written all over it.  And when you see a set in the catalog that has your name written all over it, you have to buy it.  I'm just sayin'.   I also like can't resist adding glitter to snow cards like this one : ).

It was my daughter's idea to add the cute little bows to the gingerbread people.  This is the make and take card my workshop attendees get to make this month : ).

I can't make Christmas cards without including Christ!  I love the monotone color scheme here, even though they may be earthy tones (I wasn't sure about the brown-ness, but I love the way it makes Baby Jesus stand out). 
If you can't make it to my stamp camp (Sat. Nov. 10th 9:30 a.m. and Thurs. Nov. 15th at 7:30 p.m.) but would like to send out a few of these cards, I can make them for you--contact me for prices : ).

Merry Christmas everyone!


Friday, October 19, 2012

Good For a Laugh Stamp Camp

Who wouldn't love receiving this Goofy card in the mail?  This card has a hundred different pieces, but I think it is so worth putting them all together!  Can you guess how many different times we used the oval punch to make this card?  Thirteen! 
We are big Spongebob fans at our house, so I couldn't resist copying this card that I found online.  Believe it or not, it was slightly easier than the Goofy card (I think).  Isn't it fun?
Here are the quotes I found that I thought would work well inside the Spongebob card.
This is a funny frog that makes me laugh just to look at it. 
Here's the coordinating stamp some used inside the frog card.  I just left mine blank inside, because I didn't think it would be quite as funny for me to send that sentiment to a friend as it would for, say, my Mom to send it to someone.  Not that you're old, Mom, I'm just sayin'... ; ).
We didn't make this card at the camp this time, I just wanted to show you this design I modified, leading me to the frog card design.  I just love these two oranges together for some reason.  


I hope you have a chance to lighten someone's day with a laugh today!


Saturday, August 4, 2012

Evolution of a Card

This was the first version of today's featured design.  We made this at one of my stamp camps in Oregon.  I liked it a lot back then.  Now that it has evolved, this design doesn't look quite "finished" to me.  A few notable differences between this card and the future versions are:  1) I used the Big Shot for a polka dot background on all versions, but this one--created by a Textured Impressions plate-- is not as pronounced as the dots created by the Perfect Polka Dots Embossing Folder.   2) Obviously, the colors are different.  I like these colors, but this card still needs something shiny, or something, right?  The paper button plus Linen Thread seems a little dull.  3) The butterfly that is "popped up" with Stampin' Dimensionals here was cut out by hand.  This was before I owned the butterfly punch.  It's so much easier (and nicer!) with the punch!

Version 2: made at a stamp camp in PA.  Much improved!  Still nothing shiny, but the individual features here are much more pronounced and bright.  The colors are Springy and have a nice contrast, the polka dots are poppy, and the butterfly punch just helps add to the "professional finish" feel.  At least to me, it does : ).
Version #3:  We changed the colors once again here for a special occasion.  By "we," I mean one of my best neighbor friends and I.  She and I together made 30 of these, in the form of an invitation to her mother's 80th birthday party.  We left off the punched butterfly just for the sake of time--we made 30 of these in just a few hours and popped them in the mail just in the nick of time.  I thought it was a fun/nice touch the way we dyed the string on the flower center to match the little green flowers (by pressing and pulling the string across an ink pad).  The best part of this project was... that we also made party favors to match!
Here is the most recent version.  My favorite!  This card was also created for a special occasion:  it was a wedding gift.  I made 12 cards just like this for the bride and groom, in their wedding colors, yellow and gray.  These were left blank inside, so that they could send them as Thank You cards, or whatever they choose.  I loved being able to add the silver embossing and silver cord for a the shiny effect! 


 I hope you enjoyed observing this design's journey with me!